In order to have text looking better - and easier to read - a simple text editor is provided.
To apply a style, select a text string and click on the desired style button.
To remove a style and reset a text to normal (including de-activating a hyperlink), insert the mouse cursor anywhere inside the formatted text and click on the Remove Style button.
Note that the Remove Style button will sot suppress inserted images. To delete an image, simply select it with the mouse pointer, and use the Delete method of your choise - as in any text editor.
Styles Summary
 |
Strong: equivalent to Bold |
 |
Emphasis: equivalent to Italic |
 |
Heading 1: sets the selected text to the first level of titling |
 |
Heading 2: sets the selected text to the second level of titling |
 |
Internal Link: creates an hypertext link to a previously uploaded file resource - see the Managing Resources section for more information. |
 |
External Link: creates an hypertext link to an external webpage or website. |
 |
Image: allows the insertion of previously uploaded images and pictures. |
 |
Bulleted List : allows the creation of a bulleted list. |
 |
Numbered List : allows the creation of a numbered list. |
 |
Change: allows to highlight text changes. |
Standard Text Attributes
Use the Strong, Emphasis, Heading 1 and Heading 2, Bulleted List and Numbered List styles fairly much like you would in any text editor.
Internal Link
IMPORTANT: Internal Links can not be applied to formatted text (this would result in the link not working in the email notifications).
As a result:
- Do not insert Internal Links in formatted text.
- Do not apply formatting to text containing Internal Links.
In order to have a text linking to an internal document, the latter should be uploaded beforehand (see how to upload resources in this section).
Assuming this step has been performed, you may now firstly highlight the part of text meant to serve as hyperlink and then click on the Internal Link button:
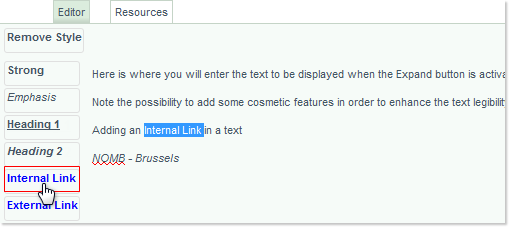
A Resources windows pops up - from which you select the target item (in the case of this example, the Additional_Resource_Material.pdf file) then click on the Insert Document Link button:

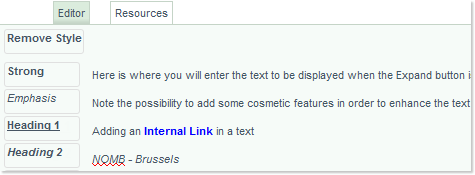
The edited text is now turned into a hyperlink, as indicated by its blue color:
External Link
Here as well, highlight the part of text meant to serve as hyperlink, but click on the External Link button instead:
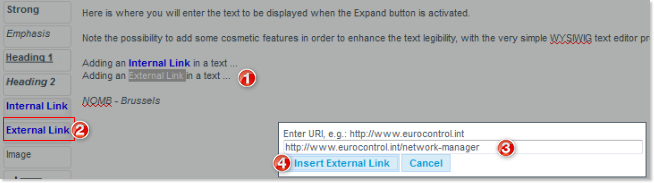
1 - Select the text
2 - Click on the External Link button
3 - Enter the target URL
4 - Click on the Insert External Link button
Image
The process to include an image is the following:
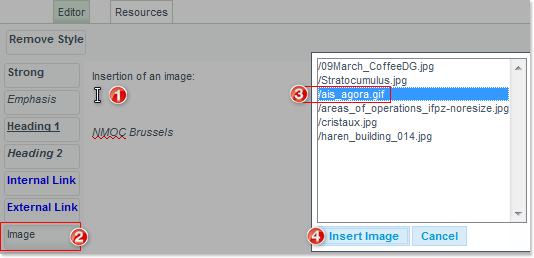
1 - Indicate the insertion point
2 - Click on the Image button
3 - Make your selection from the list of previously uploaded resources - see the Managing Resources section for more information.
4 - Click on the Insert Image button: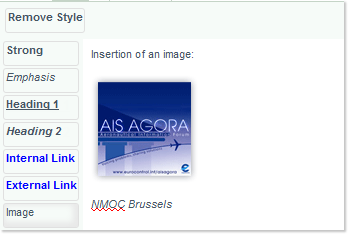
Change

1 - Select the text
2 - Click on the Change button:
