Some uploaded schedules may generate too many conflicts when initialising the file, so some companies have compiled Call Sign Maps, containing the Flight ID's (Call Signs) to apply against the original CFN from the same file.
This section assumes that you know how to create and edit views. If this is not the case, please refer to the Create New - Edit View section.
Uploading a Map
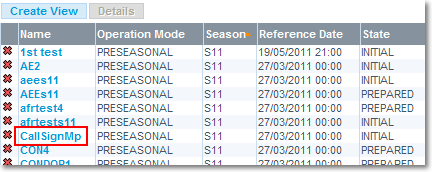
From an previously Saved & Locked view, proceed ad follows:
1. Open the View Details window
2. Click on the Upload Schedule button

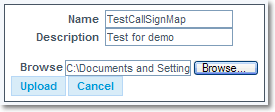
3. Provide a Name, a Description, and Browse your file system to locate the desired file - then click on the Upload button
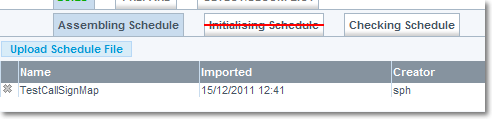
4. Caution: do not go to Initialising Schedule yet !
5. Click on the Setups button..

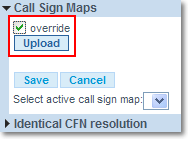
6. ... and Open the View Setups section, then the Call Sign Maps subsection
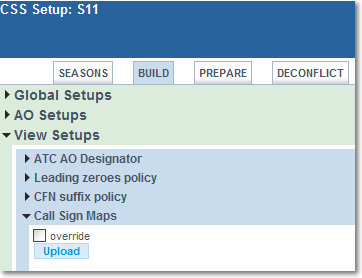
7. Check the override box, then on the Upload button
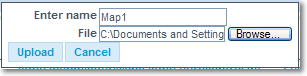
8. A diolog box will pop up: locate the file in your file system, give it a name, and then click on the Upload button
9. The newly uploaded map is now listed, as shown below. Check now override again, then click on the Save button to make the map Active
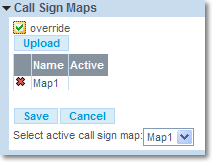
An active map is indicated with a check mark  in the Active column
10. You may now close the Setup window and go back to the Workflow window to resume and proceed with the initialisation
11. Open the Initialising Schedule tab and click on the Initialise Schedule button

The initialisation will use the CFM from the SSIM file, and where it finds one, the Flight ID from the Call Sign map.
12. The successful completion of the process is indicated with the message 'Schedule fully initialised'.
