The Airspace Application is in many ways similar to what can be found from the NOP Portal. One of the significant addition is the possibility to manage OTMVs (Occupancy Traffic Monitoring Values)
Creating an OTMV
From the Airspace Application
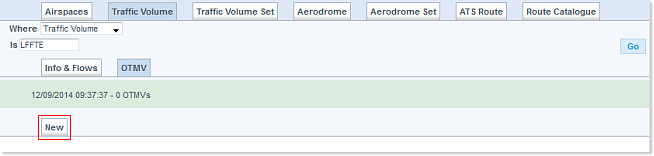
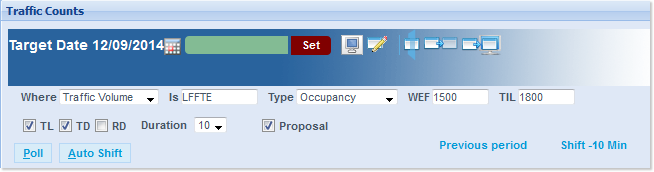
First of all, define a Workspace and select the Airspace application from the Applications tab, to open the OTMV window. For this example, we have queried the Traffic Volume for LFFTE.
Locate and open the OTMV tab:

Next click on the New tab to open the OTMV editor:
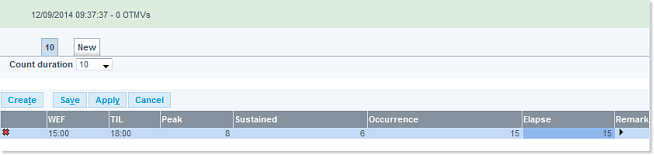
Now click on the the Create button:

A blank line is created in the table:

In the following example we have set the following parameters:
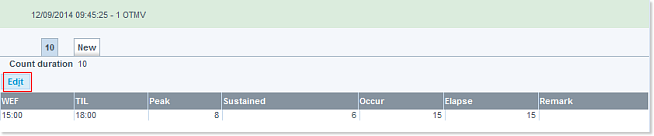
- Count duration = 10
- WEF = 15:00 (note that the time must be set in the future)
- TIL= 18:00
- Peak = 8
- Sustained = 6
- Occurrence = 15
- Elapse = 15
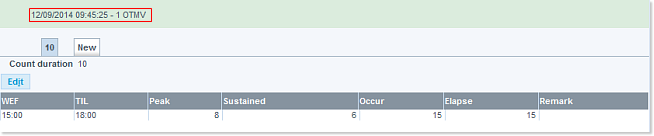
Which results in the following update (note the creation of the tab labelled 10 as a result of the Count duration selection):
Click on the Save button - the editor closes and entry is now saved and the Query Result light green area also reflects the update:
From the Traffic Counts window
Here follow the steps involved in the creation of an OTMV (Occupancy Traffic Monitoring Values) from the Traffic Counts application.
First of all, define a Workspace and select the Traffic Counts application from the Applications tab, make sur ethe Chart tab is selected, and click on the OTMVs button:

This action opens an Airspace window, where you will be able to proceed as above described.
Editing an OTMV
Click on the Edit button to launch the editor and get the following possibilities:
- make changes to the set parameters
- delete an entry (click on the
 Close red cross)
- create another entry
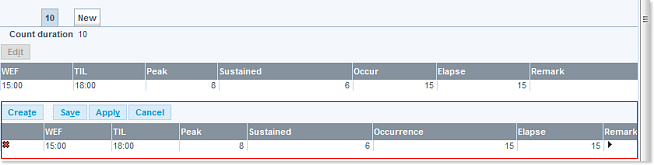
Attention: The modification of an OTMV is only possible if the period is not exceeded.
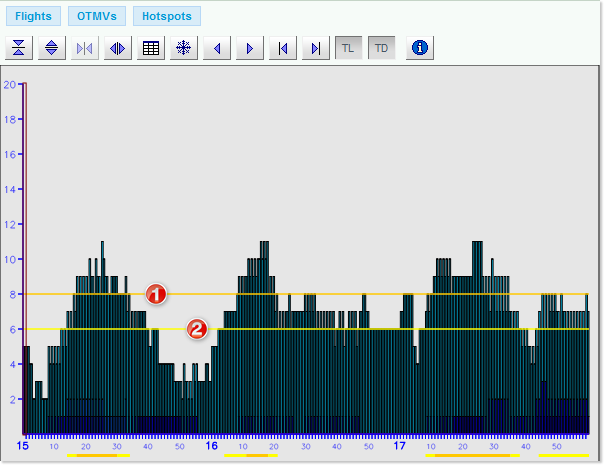
Checking the Counts
1° Open a Traffic Counts window and recall the created OTMV:
2° see that the 1 peak OTMV and 2 sustained OTMV are indeed reflecting the settings: